|
Fragmentation & Sliverisation
Techniques by Alf Murtell |
|
|
How would you make a convincing
representation of a large tree in full foliage "bloom" and get
it to look convincing in the medium of marquetry? |
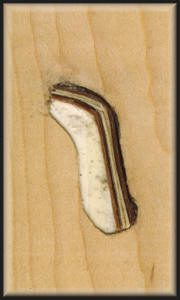
 An excellent example of fragmentation. |
||
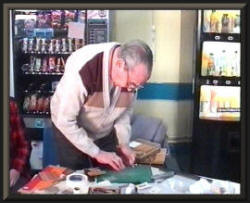
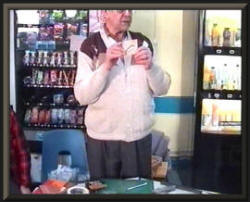
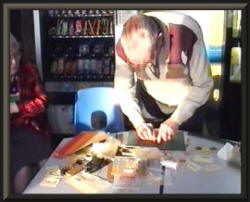 Alf cuts some fragmentation scraps |
The first step with fragmentation is to cut up a usable amount
of veneer scraps for the job in hand. In fact, it's probably a good idea to cut up a surplus amount of scraps and save them in containers for future use. If you opt to do this, make sure that you keep the varieties of veneer fragments separated because you don't want them all mixing together before you get the chance to judge the amount of "colour mixing" required for the picture you will be working on with them. Don't forget that these veneer fragments are going to be your colour palette and textural effects for certain parts of your marquetry pictures (only if needed of course) so you definitely don't want them mixed up in an uncontrolled way. We have found that useful type of containers for storing fragmented pieces are those small clear "pill" bottles you get from your doctor - the plastic screw top ones are ideal. |
||
|
It is also possible to purchase a very fine coloured form of
fragmentation / wood dust from modelling shops (i.e. shops that
supply model constructional kits and their accessories, not, the
sort of "models" that 'strut their stuff' walking down cat
walks!). This coloured fragmentation is used for making the scenery on model railway layouts. It is generally used for making very convincing grass and foliage effects and being wood dust / fragments is totally 'legitimate' for marquetry usages. It's only drawback is that it is a little strong in it's colouring, although if you are using coloured veneers in your picture then this form of fragmentation will blend in very well. In Britain you will find that the well known firm of "Hobbies" do stock and supply the described coloured fragmentation dust as a model railway accessory. |
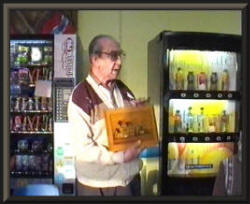
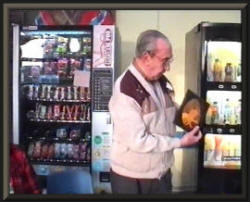
 Alf shows some containers of fragmentation scraps |
||

|
If you wish to make your own fragmentation you will first need
to cut a small bundle of thin strips of veneer. Make the strips as thin as you can in order to ensure that your fragmentation pieces are of a small enough size (almost like coarse sand particles in size is a good rule of thumb to use when making your own fragmentation pieces / dust) You will find that not all veneers respond that well to cutting up into fragmentation. Brittle veneers tend to fracture into fairly large jagged scraps of a very irregular nature. There is a way of turning such veneers into fragmentation, but it is one I haven't tried doing personally, but I have been told that it works rather well. A word of warning though before I describe the method and it is this: you will be using a food preparation item for making your fragmentation, so ensure that you keep things scrupulously clean after "grinding up" your wood because some woods can have toxic effects and you don't want to cause yourself any tummy problems. |
||
|
The piece of kitchen equipment you need for this task is an
electric coffee grinder (preferably an old one that you will not
be requiring to use any more for it's original purpose). All you will need to do is cut up some coffee bean sized pieces of your selected veneer, place them in the grinder "cup" and switch the grinder on. Just give the veneer pieces a short burst of "grinder" and then check to see the size of the fragments. Don't over grind the pieces otherwise you'll end up with fine dust - and that certainly won't give the impression of foliage on a tree in the same manner as well judged fragments will give, in fact a little variation of size in the fragmentation scraps will add a more realistic representation of leaves etc, than uniformly diced pieces could achieve. After you've prepared your fragmentation scraps you will need to prepare the window in your veneer that will be receiving the fragmentation. |
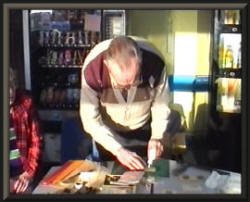
Alf places some glue in the vacant window
before |
||
 Alf
puts the fragmentation pieces into the glue |
How you proceed now is, cut your window in your picture veneer
in the usual way - exactly the same way as if you was just going
to insert another piece of veneer in the normal manner. But this time, instead of using the window as your cutting template for your next piece of veneer, you cover the face of the window with sticky tape (masking tape is useful for this purpose, although Alf recommends using gummed veneer tape) so that the empty window is fully covered and "reverse side" of the veneer presents you with the the sticky (or gummed) side of the tape filling the empty window. You now place a layer of glue (PVA for preference) in the window so that it covers the sticky (or gummed) surface of the tape, then you place a quantity of the fragmentation pieces in on top of the glue. Pack the fragmentation in to the empty window (you want sufficient material to absorb the glue and fit slightly proud of the veneer surface) and then put it aside for the glue to dry and set (about an hour or two is generally sufficient). Once the glue has set, sand the surface to just above flush and continue assembling your picture in the usual way. |
||
|
The next thing we will look at is the technique of
sliverisation, which is a useful method of depicting realistic
hair in a marquetry picture. Sliverisation is an extension of the fine lining techniques where, in this instance, you pack a series of "fine lines" into a space, one on top of the other, until you have achieved the effect that you are after. It is a little bit of a long winded technique and does take a fair bit of patience in it's application, but the end results are certainly worth all the effort. Your first step is to make your fine lines. This you do by "planeing" some thin strips from your selected veneers by placing them in a clamping arrangement and running your plane (set to a fine setting) along the side of them so that you end up with a collection of "fine lines" Take care when using your plane in this manner for the safety of your fingers, if you have a vice handy place the clamping arrangement in the vice and "plane" your fine lines in safety. Alf is an "old hand" at the techniques and is an adept at using hand tools and he has fingers of steel, so he feels confident to use the tools in the manner he does in the photos, so, unless you've got Alf's sort of experience we suggest that you err on the side of safety when using hand tools. |
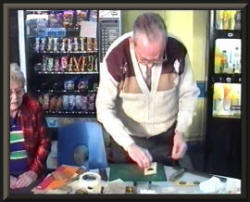
 Alf
shows us his clamping arrangement used for |
||
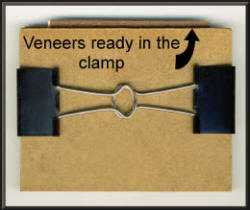 A close up view of the clamp that Alf is holding in the photo above right |
The photo on the left gives you a
better idea of the clamp that Alf is using. All it is, is two pieces of thick hardboard (or MDF sheet if you prefer) and two "Bulldog" clips for holding the clamp together. Alf recommends placing three pieces of veneer together in the clamp, so that when you plane your fine lines you actually cut three pieces at one go. This doesn't give you any better results, but it does reduce the time it takes to cut the fine lines, plus, it adds a little structural strength to the veneers while you are cutting them, and it avoids the veneers bending slightly causing minute distortions. Once you have cut sufficient fine lines you may find that you will want to pre-curve them before you attempt to place them in your "window". You do this by rubbing along the strip's with the side of a pencil (or something similar) so that the strip curves naturally. This will make the strips easier to insert into the vacant window and will help you when you are building up a series of the strips when depicting a head of hair. |
||
|
Prepare the fine lines as described above and put them to one
side to dry so that they will be ready for you to use. The next step is to cut the "window" in your picture veneer and place some tape over the face of the window (as you did with fragmentation) and you now place a smear of glue on the edge of the window where you are going to start building up your sliverisation pattern. The best tool to use for the next part of this technique is a pair of tweezers. With the tweezers place a fine line in the window along the edge where you placed the smear of glue. Make sure that the fine line is nice and tight up against the edge of the window - you will probably need to press it into place with a suitable implement (I use an old teaspoon for larger areas or a tooth pick for small areas) and then when the glue has "taken" I add the next fine line, and repeat the same process continually building up the pattern until I've achieved my final goal, which is generally realistic looking hair, although other intricate patterns can be built up using this method. The only drawback with sliverisation is that it is a very long winded process, so do bear this in mind if you wish to use the technique. |
 Alf
planes some sliverisation strips using the |
||

Alf shows
you some fine line |
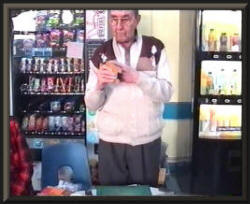
 Alf shows you a small pack of veneers ready for planing |
||
 And if you want them, they're available in different colours! |
 The
above is an example of the commercial |
||
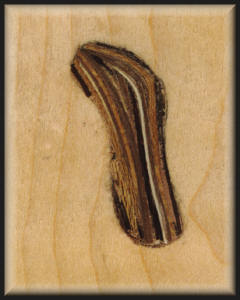
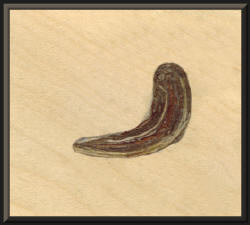
 An
example of fragmentation being used to depict |
 Alf
fits some more sliverisation strips in |
||

And here are
two examples I finished |
 And
here are those same strips fitted in |
||
 This is one I prepared earlier! |
 Here is some sliverisation |
||
|
Alf pre-curves the fine lines |
 These are the planed off strips |
||
 Now, this picture is a very good example of sliverisation |
 You sneezed - now look at what's happened to my fragmentation!!! |
||
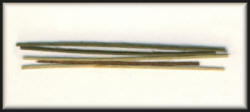 Strips of Sycamore, Walnut and Mahogany |
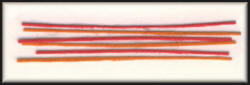 Strips of dyed veneer |
||
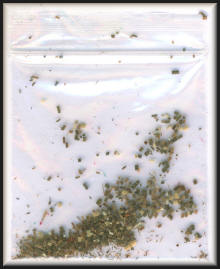 The above veneers chopped up minutely |
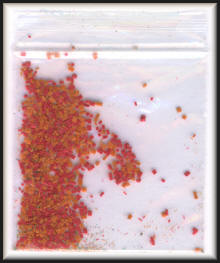 The above veneers chopped up minutely |
||
|
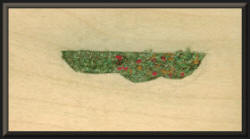
Cut out your window, and stick gummed tape on the face side of the picture, smear white PVA glue on the gummed paper and sprinkle the fragmentation over the window. Press lightly into position, and leave to dry. It can then be lightly sanded down. Example below: As an alternative to chopping up green veneer, try using scenic modelling material, as used in model train lay outs. This material comes in various shades of green, and is used in the same way as mentioned above, when dry it can be sanded down, it will also take cellulose sanding sealer. Mix fragments of the dyed veneer with the green, this will give the effect of flowers. See example below: |
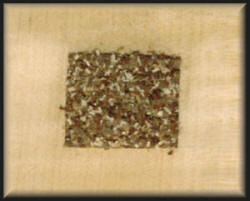 The finished and sanded fragmentation |
||
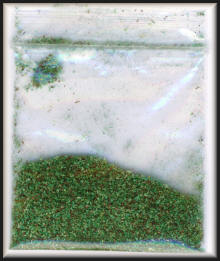 Green scenic modelling material |
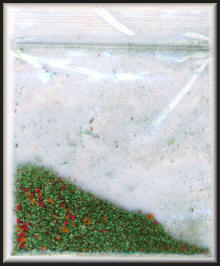 Fragments of dyed veneers added to the green material |
||
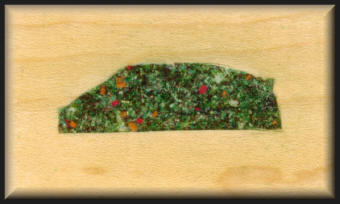 Finished window sanded down, and two coats of cellulose sanding sealer applied |
|||
|
This procedure is similar to fragmentation, except that the
strips are not cut into small pieces. Cut out the window and
stick gummed paper on the face side of the picture. Smear white
PVA glue on the gummed tape, and bend the strips of veneer to
follow the contours of the window. Pieces must be laid
individually, and pressed into position. A pair of tweezers will
help you with handling the veneer. Vary the selection of veneers
to allow for shadow etc. After cutting the strips of veneer rub a metal rod or something similar over the veneer, this will help to flatten the veneer and cause it to bend, which will help when placing it in the window. This procedure will give a good impression of hair. |
|||
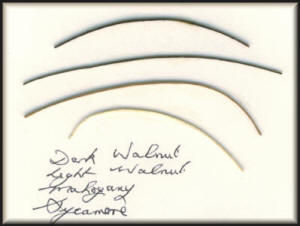 Strips of Dark Walnut, Light Walnut, Mahogany and Sycamore |
|||
|
|||
|
The above text and marquetry examples were taken directly
from Alf's tutorial notes. We hope you have found them
instructive. A NOTE ON THE SCREEN SHOTS USED: As we decided it was best to use only one camera when recording these tutorials to DVD in real time, we have refrained from doing macro shots in order to retain the "Group atmosphere" and involvement of those tutorials. We think this approach works well, the only drawback being the loss of any real close ups, but as we include alternate "close ups" of the examples such as seen above, we think we get the best of both worlds in these tutorials. We hope you agree that it works well for the "web medium" |
|||
| Tutorials Menu | |||