

|
Scraper Tool Tutorial by Alf Murtell |
|
|
This evening’s demonstration
is all about scrapers and scraping - and it doesn’t always refer
to marquetry, you may even find some good uses for scraping with
many other aspects of woodwork. |
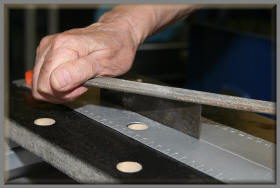
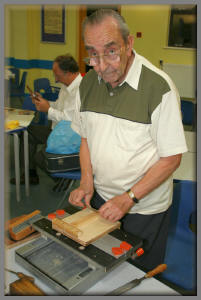 Alf shows us how to use a cabinet scraper |
||
|
Now, if you are going to use
one of these blade scrapers the first thing you’ll want to know
is how to sharpen and prepare the scraper. So, let us firstly consider what this particular scraper actually is, it is just purely a steel sheet, at least that is what it remains until we perform some special preparations on it that will turn it into a very useful tool for us. |
|||
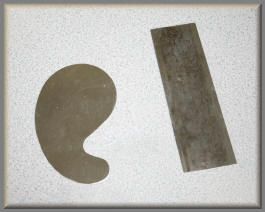 Examples of curved and straight scrapers |
|
||
|
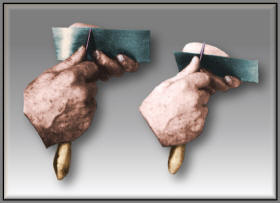
"yes indeed, you are making a right angle
which, if you put it under a microscope would look nice and
sharp - and which you also have to set or burnish that edge to
produce your cutting lip" "in fact you are
making it curl round a bit?",
“yes that is right, but you can lose it's edge after a period of
use so you will not then get your clean shavings off of it. |
|||
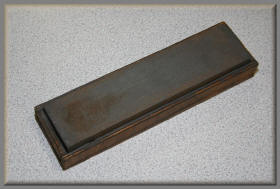
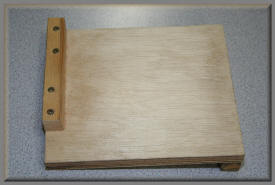 A view of Alf's home made Bench Hook (as described in paragraph 1 above). Alf has made this one for left handed use. Right handed users will place the "gap" on the right. |
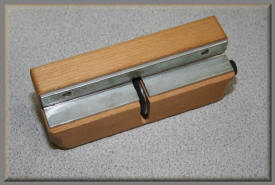
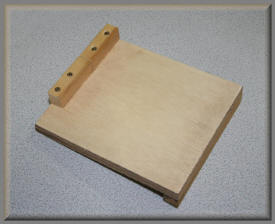 Another view of Alf's Bench Hook. |
||
|
There is another way of completing this process if you do not have a vice to hold the scraper. But I would advise you to take great care and use a piece of rag or something similar and hold the scraper in the rag and then draw your burnishing rod along the long corner so that you form a kind of lip along the edge - but do watch what you are doing and take care. |
|||
 Filing the edge of the scraper blade flat. |
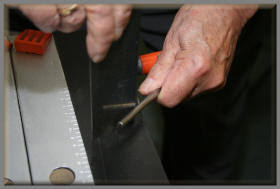 Using burnishing rod without the facility of a vice. |
||
|
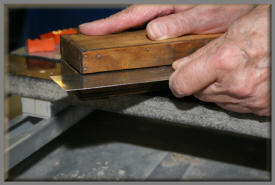
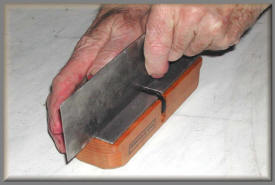
The third way of forming the cutting edge is with this German burnishing and setting tool that has a steel disc which is set into it at the correct angle to form a cutting edge which will have the optimum angle for maximum cutting efficiency. The setting tool is very easy to use because all you do is basically lay the tool on your bench and just draw the scraper through to form the lip along it's edge, it is as easy as that. Now comes the big question, it is time to check the proof of the pudding and we are going to test those scrapers we have just sharpened. By the way, it's important to mention here that you just scrape with the grain you don’t do anything else. Let’s say that you have got your picture down on your work surface and that you are ready to begin scraping and you have got your 6” x 4” scraper ready sharpened and it’s raring to go, you will need however, to watch what you are doing and take great care because with a scraper of that size, which is about 6 inches or 15cms long, you could easily be touching other veneers’ (you know the surrounding veneers), so if you can manage it only try to scrape your one veneer because if you start using it wrongly it could touch the wrong veneer and you could very easily tear it up and then you’re going to be well and truly “for it”. |
 Clearing filing marks with the oil stone. You just "slide" the edge of the scraper blade along the side of the oil stone whilst it's still in its box as shown in this photo. |
||
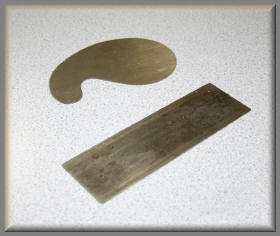 The "blade" scraper and a "Goose Neck" scraper. |
 The carborundum oil stone Alf has used for clearing the filing marks from the "blade" scraper edge. Seen without its lid. |
||
 The German burnishing and setting tool. |
Your picture should be stuck
down well before you begin and it also mustn’t have any
blisters, so watch what you are doing if you are going to use
any scrapers. Alf scrapes a test piece and gets some nice curls of wood, “there you are a nice clean scraping, okay with that?”
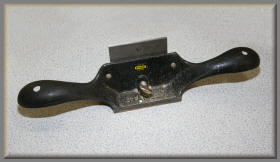
The next scraper I am going
to show you is a Goose Neck scraper. This is used mostly on
mouldings or the edge of tables, legs or anything like that.
I’ve just brought a spindle along to demonstrate it, but you
wouldn’t use it on marquetry, so it’s no good saying you will
because you won’t. So that’s one odd example. |
||
|
You can get replacement blades for these
so there is no need to worry about sharpening or anything like
that. If you want to rub a file along it you can do. These small Skarsten scrapers are very good scrapers for marquetry, I can highly recommend them. They come with a spare set of blades and cost about £5. 00 each which is not a tremendous amount of money, so what more could you want? It certainly saves all that trouble of getting your flat steel blade scraper and placing it in a vice and filing it, then flattening it on the oil stone and setting it. This one is already set up for you! |
 Putting the "edge on" with the mechanical burnishing and setting tool. |
||
 Small Skarsten scraper |
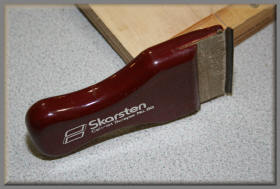 Large Skarsten scraper |
||
|
|||
 The "Speedy Surface Scraper" |
 Double Handed Cabinet Scraper. Very similar in appearance to a standard spokeshave woodworking tool. This tool differs in applying a "bend" to the middle section of the blade. |
||
|
Eric Horne, one of our late members, he made these next scrapers I am going to show you. They are very useful. He was a very talented craftsman was Eric, because all he used was a hacksaw blade ground down at the edge and fitted to a wooden handle. You used it in a similar manner to the Skarsten scraper and it was, and is, very useful for removing veneer tape and paper from your work, you can really use it however you like - “here are another two he made” interjects Dave Walker, “oh yes these are excellent" – “he made them from industrial power saw blades you know” yes, he was a real craftsman was Eric. I know some of you will have not seen his work, but his farmyard models and other equipment he made are absolutely marvellous. But however, if you wanted to make one of these scrapers yourself you will find that they are quite simple to make – you get a piece of old hacksaw blade and grind the teeth off then form a piece of scrap wood into a handle shape and make a saw cut to fit the piece of hacksaw blade in, then fit the piece of blade in the saw cut and bind it in with some tape wound tightly round that saw cut section so that it clamps the piece of blade in place nice and securely. And voila! Now you have got a scraper you’ve made yourself that is a really good and handy tool, I would really recommend that one. “If anybody does try to grind one of those blades down Alf, they have got to be particularly careful as they can shatter” Oh yes, if anybody’s not sure or unhappy about what they are doing, they have got to get someone who knows a bit about it to do it for them, don’t take chances. Another useful point about this tool, especially with this wooden handle is that if you are attaching banding, this is very useful for pushing it up against the edge, it’s a wedge shape and is very handy. Now here is, what may seem to you to be a very strange object to be considered to be classed as a scraper, it is a piece of broken glass! Some craftsmen consider this to be a very good scraper – and – they can, believe it or not, get some very good results with it. If you intend to use this idea I would recommend wrapping the glass in a piece of rag or wearing gloves. The last one I’ve got to talk about is a large double handled cabinet scraper, but as you can see it’s definitely not for marquetry. It works on the same principal as that flat steel scraper inasmuch as it needs to be used with a slight bend in the middle of the scraper blade to work correctly. I’ll show you how to set this one up – the first thing is to open it up and release the back plate and lose your blade, right, there’s your blade, its got two edges on it the same as your ordinary scraper. Put it in the back of the double handled frame, you can either rest it on your work like so, tighten up the screws and then with the thumb screw on the front start screwing it up until you form a bend in the blade. And that works, as I said, with the same principles as the normal steel blade scraper. |
|||
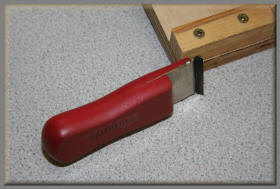
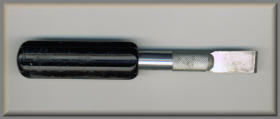 A small flat Swann-Morton number 18 blade. This blade doubles as a very good miniature scraper. It is very handy for removing glue "blobs" and recalcitrant veneer tape. This scraper is similar in principle to the one designed by Eric Horne as mentioned in the text. |
 Using a sharpener rod to form the scraper edge. |
||
|
Have you any questions? “Yes Alf, with that first scraper, the steel blade scraper, do you have to bend it?” oh yes, as I said, if you have a bit of arthritis in your hands you may find it a bit of a job to bend – I mean you should be able to bend it a bit, rather like so, but if you can’t, well - “I’ve got one at home Alf but I can’t bend that!” well, as I said earlier on, if you are having trouble using the steel blade scraper, then these Skarsten scrapers would be your best bet, but take care if you are going to use the larger one for your marquetry as the corner edges could damage your marquetry if they catch on it, but with these you do get shavings off rather than just wood dust. “I’ve used a scraper to flatten this picture” says Harry. Oh excellent, I’ll show this to the group – now as you can all see here, Harry has used a scraper carefully and although the grain is running in all directions, he has had no problem at all with his use of the scraper, “yes, you’ve just got to be very careful” quite right, so there’s a good example of using a scraper without acquiring any problems. “After I’ve finished levelling it off with the scraper I use three coats of sanding sealer before I use sand paper to finish it off” – well there’s recommendation for you, use the scraper to level it, then apply three coats of sanding sealer and finish it off with your sand paper, thanks for the information Harry. “Here’s a piece of turtle shell Alf, will it respond to the scraper?” – Right, well we have a piece of turtle shell here that I am going to see how it responds to the actions of the scraper. It’s working quite well, we are getting some good shavings from it, so that’s a good example there of how a scraper can be used to successfully treat something quite different from wood. Have you any other questions? “No, - thanks very much Alf.” The audience applauds - and
then end of the demonstration. |
|||
| Tutorials Menu | |||